Previously I wrote about how to cut your clothing. If you feel that you need something else to spice up your closet, iron-on patches might be what you are looking for.
Iron-on patches are a cheap, easy, and fast way to add something new to your clothing. Here are some tips to make sure everything goes right.
First, gather all the needed materials: a clothing item, iron, tape, and iron-on patches.
After gathering all the materials, place your clothing item down on a flat surface and begin to plan your design. If you are using multiple patches, this process may take longer. To make sure your designs look good, look up photos of other designs beforehand.
Once all the patches are placed, tape the patches onto the piece so that you can pick up the clothing item and try it on to make sure it looks right.
When the final design has been chosen, start by taking off the tape and ironing on only one of the patches. After the patch is done and seems to be sticking to the cloth, wait 10-20 minutes to make sure that the patches will stick to the cloth and not fall off when you wear the item.
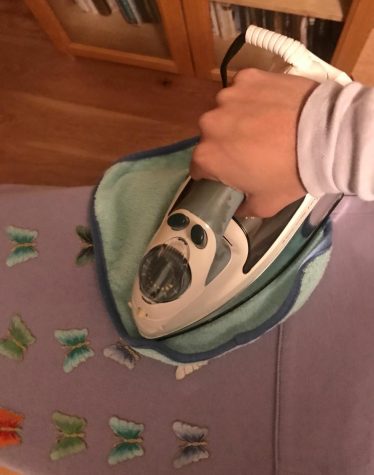
When ironing the patches, make sure to put a thin towel or cloth underneath the iron so you do not ruin the patches.
If the patch sticks, continue to iron on the whole design. Once everything is stuck, the process is complete. You may have to iron patches on a few times to make sure they stick. If they still do not stick, you may have to sew on your patches. Sometimes the patches will hold temporarily, so make sure to wait a few days before you wear the item outside of the house.
When trying out the iron-on patch, my biggest recommendation is to spend time on the design to make sure you will not regret it. Always remember that you are still adding something unique to your closet without having to spend a lot of money!


